Part 1: How to set up a CI/CD pipeline to deploy your MuleSoft apps to CloudHub using GitHub Actions
In this post, we'll learn how to create a simple CI/CD pipeline to deploy Mule applications from GitHub to CloudHub using GitHub Actions.
CI/CD Pipeline with MuleSoft & GitHub Actions· Part 1 of 6
- 1.Part 1: How to set up a CI/CD pipeline to deploy your MuleSoft apps to CloudHub using GitHub Actions
- 2.Part 2: CI/CD pipeline with MuleSoft and GitHub Actions - secured/encrypted properties
- 3.Part 3: CI/CD pipeline with MuleSoft and GitHub Actions - MUnit testing
- 4.Part 4: CI/CD pipeline with MuleSoft and GitHub Actions - MUnit minimum coverage percentage
- 5.Part 5: CI/CD pipeline with MuleSoft and GitHub Actions - Enabling MFA through a Connected App
- 6.Part 6: CI/CD pipeline with MuleSoft and GitHub Actions - Deploying to CloudHub 2.0

Creating CI/CD (Continuous Integration, Continuous Delivery) pipelines for your code has become a standard practice. Instead of worrying about deployments and keeping your environments up to date, you can set up this automated pipeline to do the deployments for you. You can focus on developing your code and let the pipeline take care of the rest.
In this post, we’ll learn how to create a simple CI/CD pipeline to deploy Mule applications from GitHub to CloudHub using GitHub Actions.
We’ll be using this GitHub repo for this example.
Set up your repo
We won’t go into the details of creating a GitHub repo with your Mule application. You can take a look at the example repo we’ll be using throughout the post so we can focus on explaining the CI/CD setup.
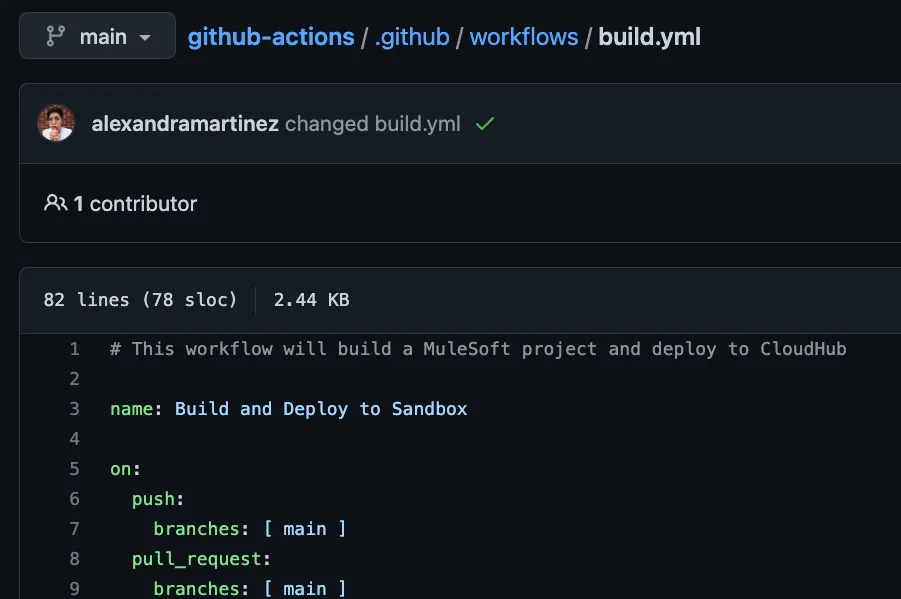
Once you have your Mule application in a GitHub repo, create a folder called .github, and inside it, create another folder called workflows. Here, create a new build.yml file and paste the following contents into it.
name: Build and Deploy to Sandbox

on:
  push:
    branches: [ main ]
  pull_request:
    branches: [ main ]

jobs:
  build:
    runs-on: ubuntu-latest
    steps:
    - name: Checkout this repo
      uses: actions/checkout@v3
    - name: Cache dependencies
      uses: actions/cache@v3
      with:
        path: ~/.m2/repository
        key: ${{ runner.os }}-maven-${{ hashFiles('**/pom.xml') }}
        restore-keys: |
          ${{ runner.os }}-maven-
    - name: Set up JDK 1.8
      uses: actions/setup-java@v3
      with:
        distribution: 'zulu'
        java-version: 8
    - name: Build with Maven
      run: mvn -B package --file pom.xml
    - name: Stamp artifact file name with commit hash
      run: |
        artifactName1=$(ls target/*.jar | head -1)
        commitHash=$(git rev-parse --short "$GITHUB_SHA")
        artifactName2=$(ls target/*.jar | head -1 | sed "s/.jar/-$commitHash.jar/g")
        mv $artifactName1 $artifactName2
    - name: Upload artifact
      uses: actions/upload-artifact@v3
      with:
          name: artifacts
          path: target/*.jar

  deploy:
    needs: build
    runs-on: ubuntu-latest
    steps:
    - name: Checkout this repo
      uses: actions/checkout@v3
    - name: Cache dependencies
      uses: actions/cache@v3
      with:
        path: ~/.m2/repository
        key: ${{ runner.os }}-maven-${{ hashFiles('**/pom.xml') }}
        restore-keys: |
          ${{ runner.os }}-maven-
    - uses: actions/download-artifact@v3
      with:
        name: artifacts
    - name: Deploy to Sandbox
      env:
        USERNAME: ${{ secrets.anypoint_platform_username }}
        PASSWORD: ${{ secrets.anypoint_platform_password }}
      run: |
        artifactName=$(ls *.jar | head -1)
        mvn deploy -DmuleDeploy \
         -Dmule.artifact=$artifactName \
         -Danypoint.username="$USERNAME" \
         -Danypoint.password="$PASSWORD"
Note
You can name this YAML file however you want. It doesn’t have to be build.
This file is where the CI/CD pipeline is set up. Before we get into the details of this file, let’s first set up the Actions secrets with your Anypoint Platform credentials.
Set up your credentials
In your GitHub repository, go to the Settings tab (make sure you are signed in to see it). Now go to Secrets and variables > Actions. Here you will be able to set up your repository secrets.
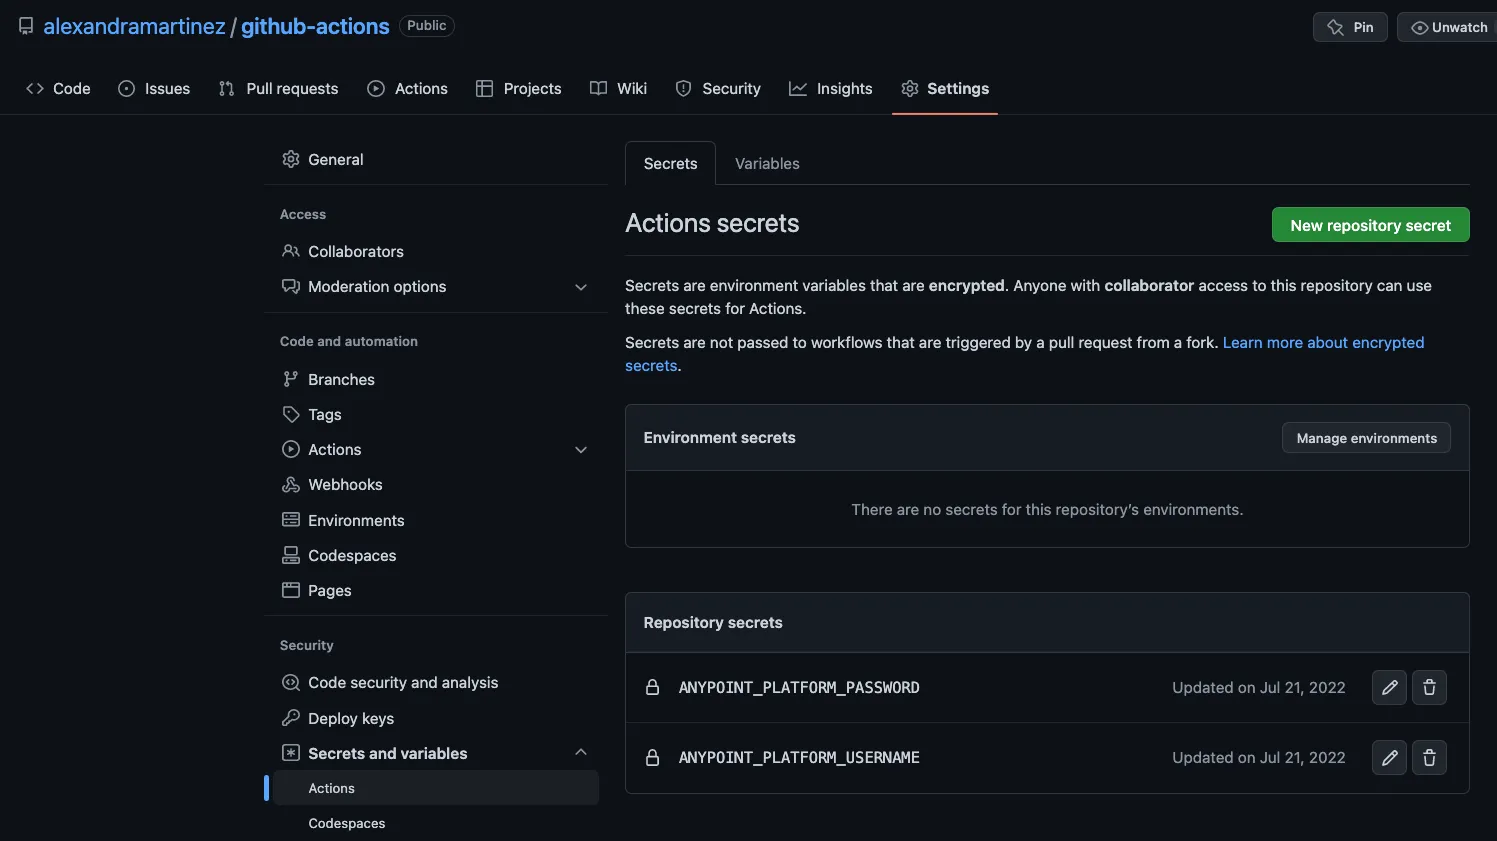
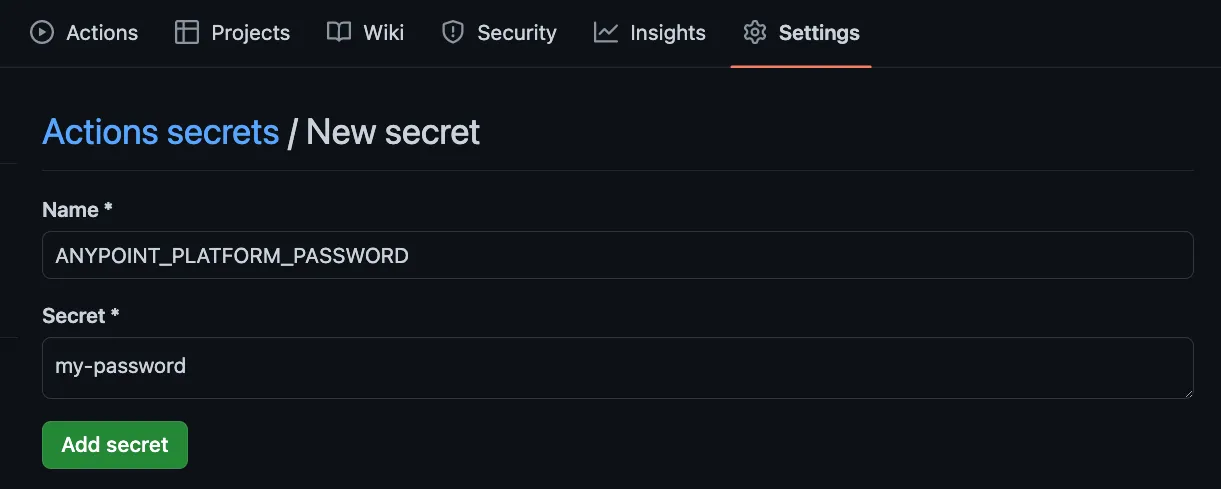
Click on New repository secret.
In the Name field, write ANYPOINT_PLATFORM_PASSWORD.
In the Secret field, write the actual Anypoint Platform password you use to sign in to Anypoint Platform.
Click Add secret.
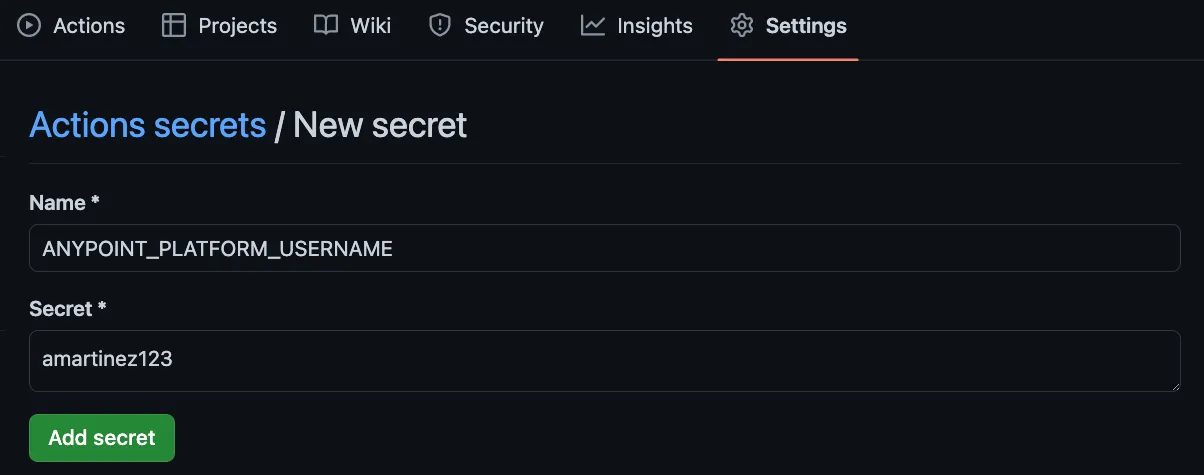
Repeat the same process for the ANYPOINT_PLATFORM_USERNAME secret. Add here the username you use to sign in to Anypoint Platform.
That’s it for the basic setup! Let’s take a closer look into the build.yml file to make sure everything is set up properly for your case.
Inside the build.yml file
Let’s go through the contents of the build.yml file so you can personalize it for your own needs. If you want to skip this explanation, you can go straight to Run the pipeline.
name
The first thing we see is a name field. This is the name of the Action that will appear in the UI under the Actions tab. You can name this anything you want.
name: Build and Deploy to Sandbox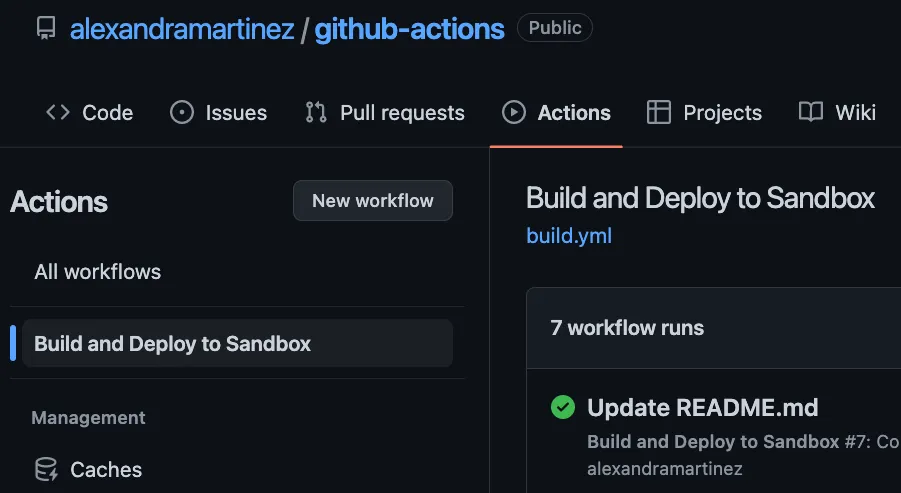
on
Next, we have the on field. This tells you when the Action will run. In this case, we have it set up to run anytime there’s a push to the main branch, or when a Pull Request has been merged into the main branch.
You can also set it up to run with a schedule, but we won’t go through that for this example. You can see a schedule example here.
on:
  push:
    branches: [ main ]
  pull_request:
    branches: [ main ]
jobs
Next, we have the jobs field. Technically, you can just create a huge job and run all the steps inside it, but it will be overwhelming for you if you need to troubleshoot a step. It is best to split it up into different jobs when possible.
It’s worth noting that jobs run async to each other. We’ll learn how to create async jobs when we see the deploy job in a moment.
In our case, we have two jobs: build and deploy.
jobs:
  build:
    [...]
  deploy:
    [...]
jobs: build
Inside the build job, we start by stating the operating system in which it will run. In this case, ubuntu.
runs-on: ubuntu-latestThen, we start listing the steps for the job. The first two steps are repeated in both jobs.
First, we have to check out the current repository in the ubuntu machine where the pipeline is running.
- name: Checkout this repo
  uses: actions/checkout@v3
After that, we set up a cache for the Maven dependencies in the ubuntu machine’s .m2 folder.
- name: Cache dependencies
  uses: actions/cache@v3
  with:
    path: ~/.m2/repository
    key: ${{ runner.os }}-maven-${{ hashFiles('**/pom.xml') }}
    restore-keys: |
      ${{ runner.os }}-maven-
Now, for this build job, we need to set up Java 8 in order to run the Maven command to build the application into a jar file.
- name: Set up JDK 1.8
  uses: actions/setup-java@v3
  with:
    distribution: 'zulu'
    java-version: 8
After setting up Java 8, we can now build this Mule application with Maven.
- name: Build with Maven
  run: mvn -B package --file pom.xml
Next, for troubleshooting purposes, we’ll change the name of the generated jar file to include the last commit’s hash. This file name will be visible in CloudHub so you can make sure the application deployed is the correct version.
- name: Stamp artifact file name with commit hash
  run: |
    artifactName1=$(ls target/*.jar | head -1)
    commitHash=$(git rev-parse --short "$GITHUB_SHA")
    artifactName2=$(ls target/*.jar | head -1 | sed "s/.jar/-$commitHash.jar/g")
    mv $artifactName1 $artifactName2
Finally, we will upload this artifact (the jar file) so it becomes available for the next job.
- name: Upload artifact
  uses: actions/upload-artifact@v3
  with:
      name: artifacts
      path: target/*.jar
jobs: deploy
We had mentioned earlier that jobs run asynchronously to each other but there’s a way to configure them to run synchronously. In this case, we need to run the build job before the deploy job. Otherwise, we won’t have any jar file to deploy to CloudHub. To do this, we use the needs field inside the deploy job to make sure the build job runs before this one.
needs: buildAfter that, the runs-on and the first two steps are the same as the previous job. The third step, however, is not to set up Java 8 because we no longer need to build the Mule application. Now, we need to download the artifact (jar file) we uploaded in the last step of the previous job.
- uses: actions/download-artifact@v3
  with:
    name: artifacts
After we download it, we can now deploy it to CloudHub using Maven. This next step will take the two Action secrets we had previously set up in the Set up your credentials section: ANYPOINT_PLATFORM_PASSWORD and ANYPOINT_PLATFORM_USERNAME.
- name: Deploy to Sandbox
  env:
    USERNAME: ${{ secrets.anypoint_platform_username }}
    PASSWORD: ${{ secrets.anypoint_platform_password }}
    #DECRYPTION_KEY: ${{ secrets.decryption_key }}
  run: |
    artifactName=$(ls *.jar | head -1)
    mvn deploy -DmuleDeploy \
     -Dmule.artifact=$artifactName \
     -Danypoint.username="$USERNAME" \
     -Danypoint.password="$PASSWORD"
  #  -Ddecryption.key="$DECRYPTION_KEY"
You will notice that there are two commented-out lines here. If your Mule application uses any sort of key to decrypt secured properties, this is where you can add it. Just make sure you create a DECRYPTION_KEY secret too.
Run the pipeline
Since we set up our pipeline to run every time there’s a new commit into the main branch, we can simply make a change to the current Mule application and commit it into the branch. Once this is done, the pipeline will be triggered.
You can go into the Actions tab to see the workflows.
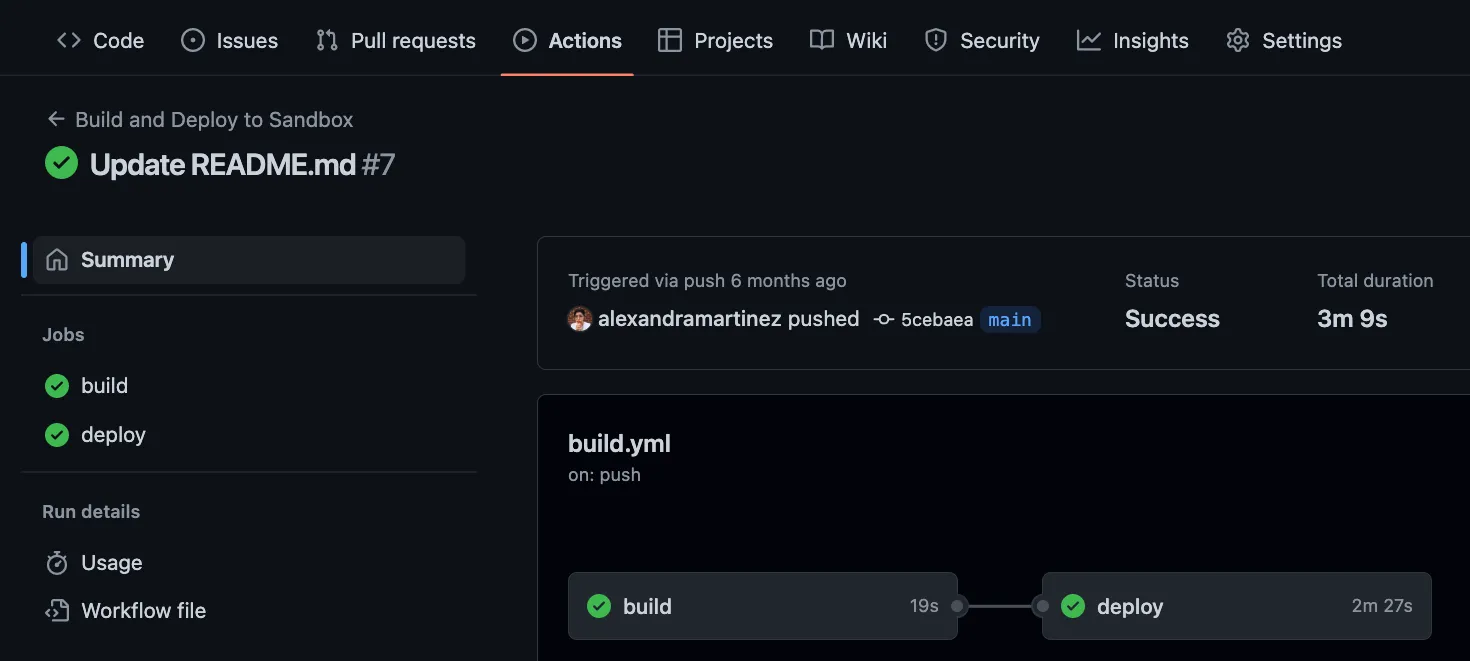
If you want to see a specific run, you can click on the title of the commit (for example, Update README.md). This will show the specifics of the pipeline run, like the jobs it ran and whether they were successful or not.
You can also click on each specific job to get a closer look at the steps and the full logs of each step. This is helpful to troubleshoot when something goes wrong in the run.
More resources
You can check out my GitHub profile for more CI/CD repos:
- github-actions to deploy a Mule app to CloudHub
- dataweave-utilities-library to publish a DataWeave library to Exchange
- api-catalog-cli-example to update APIs in Exchange using the API Catalog CLI
If you want more details about CI/CD and how I got to create this repo with these settings, you can check out the CI/CD collection from our Twitch channel.
Note
The initial versions of the pipeline are based on the following repository created by Archana Patel: arch-jn/github-actions-mule-cicd-demo.
I hope this was helpful!
Don’t forget to subscribe so you don’t miss any future content.
-alex
Reader notes
Helpful comments preserved from the original post.
- Young Mitchell · Nov 7, 2024
Hello, Alex! Thank you so much for your video and intruduction! I sucessfully deployed with cloudhub2 branch's codes. And now trying your main branch's. Firstly, Action failed on deploy step with 401 code. I find that you have nexus-ee auth info(action secret) in
.maven/setting.xml, but I donnot have. So, I tried not to deploy with nexus-ee dependencies. I delete profiles contents insetting.xmland tried again. but failed with this errororg.mule.maven.client.api.BundleDependenciesResolutionException: org.eclipse.aether.resolution.ArtifactResolutionException: com.github.everit-org.json-schema:org.everit.json.schema:jar:1.12.2 was not found in https://maven.anypoint.mulesoft.com/api/v3/maven during a previous attempt. This failure was cached in the local repository and resolution is not reattempted until the update interval of anypoint-exchange-v3 has elapsed or updates are forcedI asked chatgpt sensei with this error, he asked me to import nexus-ee dependencies... could you please tell me what should I do with this? -
Reply to Young Mitchell
Alex Martinez · Apr 10, 2025If you try the main branch, you actually do need nexus credentials because of the MUnit tests :(
- Kati Sarajärvi · Apr 30, 2024
I am unable to make the versioning work. I can to run the pipeline and get the application running in Runtime manager, but pushing new updates to main does not work. I have to delete the running app and only then can I run the pipeline successfully again, Is this a featrure or a bug?
-
Reply to Kati Sarajärvi
Alex Martinez · Apr 30, 2024could you please share the error you're getting?
- willian souza vieira · Dec 20, 2023
I´m getting this error
Error: Failed to execute goal org.mule.tools.maven:mule-maven-plugin:3.8.2:deploy (default-deploy) on project salesforce-to-twilid: Deployment configuration is not valid, : No deployment configuration was defined. Aborting. -> [Help 1] -
Reply to willian souza vieira
Alex Martinez · Dec 21, 2023Hello! You're missing the configuration in your
pom.xml- at the beginning of the post it states the following: We won't go into the details of creating a GitHub repo with your Mule application. You can take a look at the example repo we'll be using throughout the post so we can focus on explaining the CI/CD setup. Please take a look at the repo: https://github.com/alexandramartinez/github-actions You should configure something like this:<configuration> <cloudHubDeployment> <uri>https://anypoint.mulesoft.com</uri> <muleVersion>${app.runtime}</muleVersion> <username>${anypoint.username}</username> <password>${anypoint.password}</password> <applicationName>${app.name}</applicationName> <environment>${env}</environment> <workerType>MICRO</workerType> <region>us-east-2</region> <workers>1</workers> <objectStoreV2>true</objectStoreV2> </cloudHubDeployment> <classifier>mule-application</classifier> </configuration> -
Reply to Alex Martinez
willian souza vieira · Dec 21, 2023Ok thanks for reply, it worked now : D
- Julian Redwood · Jul 27, 2023
Hi Alex, I tried to implement the workflow but I'm getting an error on "Build with MAven" section "
Error: Failed to execute goal on project <projectname>: Could not resolve dependencies for project com.mycompany:projectname:mule-application:1.0.0-SNAPSHOT: Failed to collect dependencies at <> Failed to read artifact descriptor for 4<> Could not transfer artifact <> from/to anypoint-exchange-v3 (https://maven.anypoint.mulesoft.com/api/v3/maven): authentication failed for https://maven.anypoint.mulesoft.com/api/v3/<>, status: 401 Unauthorized -> [Help 1]" Any idea why? Thank you -
Reply to Julian Redwood
Alex Martinez · Jul 27, 2023Hi Julian! Make sure you're not using MFA and you're using the correct Anypoint Platform credentials (username/password). You can also contact me if you're still having issues so we can troubleshoot together :)
-
Reply to Alex Martinez
Julian Redwood · Jul 28, 2023I ended up making the API spec public and that worked ok - not ideal but will get me over the line. Thank you and great set of videos/blogs.
-
Reply to Julian Redwood
Alex Martinez · Jul 28, 2023Ohh! Well, this project did not include the API spec. I'll try to play around with that in the future to understand better how that works. I'm glad you found a workaround at least!
- Wuilver Patricio · Mar 8, 2023
¿Te funciona con la version actual de maven (
3.9.0) que tiene el sistema operativo (ubuntu)? Porque a mi no. Esto según entiendo es porque las versiones soportadas por mule maven plugin son de3.6.3a3.8.6(Mule Maven Plugin 3.8.0 Release Notes | MuleSoft Documentation) -
Reply to Wuilver Patricio
Alex Martinez · Mar 8, 2023Puedes revisar el repositorio directamente para ver si hay algo diferente con tu proyecto. Pero a mí sí me funciona perfecto siguiendo las instrucciones de los posts. Si lo intento correr localmente, yo estoy en Mac, mi maven es
3.8.4y mi java es8. Pero si lo intentas correr desde GitHub Actions, no importa tu sistema operativo, simplemente se basa en lo que está en elbuild.ymlAvísame si esto contestó tu pregunta -
Reply to Alex Martinez
Wuilver Patricio · Mar 9, 2023Todo parece indicar que depende de la imagen que cargue el runner, la version de maven no siempre es la misma, por lo que la ejecución falla aleatoriamente, lo que hice fue establecer una versión especifica en un paso del flujo de trabajo.
-
Reply to Wuilver Patricio
Alex Martinez · Mar 9, 2023Puedes postear aqui lo que agregaste en caso de que otras personas tengan el mismo problema?
-
Reply to Alex Martinez
Wuilver Patricio · Mar 9, 2023Con lo cual se establece Apache Maven
3.6.3, hice pruebas sobre el runner Ubuntu en las versiones soportadas por github-actions. Y ya hay documentación del incidente: Missing BasicRepositoryConnectorFactory With New Version of Apache Maven (3.9.0) | MuleSoft Help Center- name: "Setup maven" run: | sudo apt-get install maven mvn -v -
Reply to Wuilver Patricio
Alex Martinez · Mar 10, 2023Muchas gracias!!
FAQs
Frequently asked questions about this post.
-
Where do I put the build.yml file in my repo?
Once your Mule application is in a GitHub repo, create a folder called
.github, and inside it create another folder calledworkflows, then create thebuild.ymlfile there and paste in the pipeline contents. You can name this YAML file however you want; it doesn't have to bebuild. -
Which GitHub Actions secrets does this pipeline need and how do I create them?
It uses two repository secrets:
ANYPOINT_PLATFORM_PASSWORDandANYPOINT_PLATFORM_USERNAME. In your repository go to the Settings tab, then Secrets and variables > Actions, click New repository secret, enter the nameANYPOINT_PLATFORM_PASSWORDwith the actual password you use to sign in to Anypoint Platform, click Add secret, then repeat forANYPOINT_PLATFORM_USERNAMEwith the username you use to sign in to Anypoint Platform. -
Why does the deploy job use the `needs` field?
Jobs run asynchronously to each other, but the
buildjob must run before thedeployjob; otherwise there is no jar file to deploy to CloudHub. Addingneeds: buildinside thedeployjob forces thebuildjob to run first. -
When does the pipeline run?
The
onfield sets it to run anytime there's a push to the main branch, or when a Pull Request has been merged into the main branch. You can also set it up to run on a schedule, though the post doesn't go through that example. -
How do I deploy a Mule app that uses a decryption key for secured properties?
The Deploy to Sandbox step includes two commented-out lines for a decryption key. If your Mule application uses a key to decrypt secured properties, that's where you add it, and you should also create a
DECRYPTION_KEYsecret. -
Why does the build rename the jar file with the commit hash?
For troubleshooting purposes, the Stamp artifact step changes the generated jar file name to include the last commit's hash. This file name is visible in CloudHub so you can confirm the deployed application is the correct version.
More from this series
CI/CD Pipeline with MuleSoft & GitHub Actions· Part 1 of 6
- 1.Part 1: How to set up a CI/CD pipeline to deploy your MuleSoft apps to CloudHub using GitHub Actions
- 2.Part 2: CI/CD pipeline with MuleSoft and GitHub Actions - secured/encrypted properties
- 3.Part 3: CI/CD pipeline with MuleSoft and GitHub Actions - MUnit testing
- 4.Part 4: CI/CD pipeline with MuleSoft and GitHub Actions - MUnit minimum coverage percentage
- 5.Part 5: CI/CD pipeline with MuleSoft and GitHub Actions - Enabling MFA through a Connected App
- 6.Part 6: CI/CD pipeline with MuleSoft and GitHub Actions - Deploying to CloudHub 2.0